Adding an AI chatbot to WordPress takes about ten minutes. Installing a plugin, pasting a key, and switching the widget on is genuinely that fast, and almost every guide on the subject stops at that point.
The ten-minute version is not the part that decides whether the chatbot survives its first month. What decides that is a set of questions the install screen never asks: which pages the assistant may treat as true, what happens when it does not know, who sees the conversation next, who pays for the model, and how a wrong answer gets corrected.
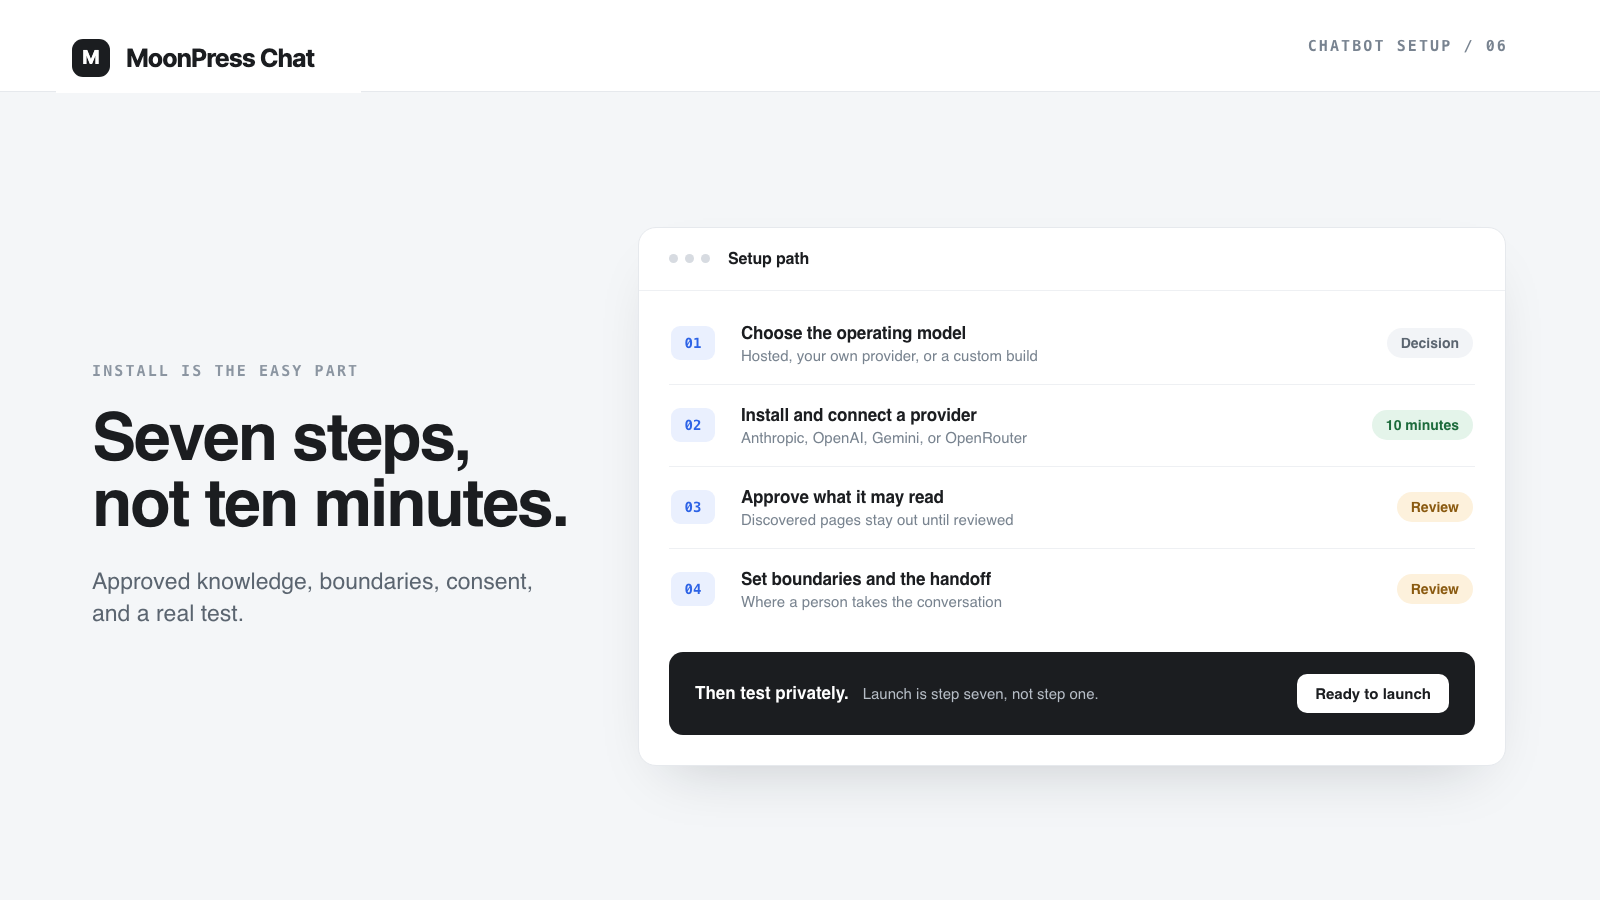
This guide covers both halves. Steps 1 to 3 get a chatbot answering on your WordPress site. Steps 4 to 7 are what make it safe to leave running in front of strangers. MoonPress Chat is used as the worked example because it is our plugin and we can describe its behavior precisely, but the sequence applies to any tool you choose.
The short version
Here is how to add an AI chatbot to WordPress, start to finish. Each step is expanded below.
- Choose how the chatbot gets its intelligence: a hosted platform, a WordPress plugin with your own provider account, or a custom build.
- Install the plugin from the WordPress plugin directory or as an uploaded ZIP package.
- Connect an AI provider and pick a model, using a key that belongs to the site.
- Approve the specific pages the assistant may treat as true, rather than crawling everything.
- Write the boundaries — the questions it must not answer confidently — and the handoff to a person.
- Add an AI disclosure the visitor sees, and decide retention deliberately.
- Test privately against real questions, define the rollback, then launch and review after a week.
What to prepare before you install anything
Two of these take a minute. The third is the real work, and doing it before you install anything will save you a rewrite later.
- A WordPress site you can install plugins on. MoonPress Chat needs WordPress 6.2 or newer and PHP 7.4 or newer; most modern hosting is well past both.
- An account with an AI provider, if you are choosing a bring-your-own-provider plugin. Anthropic, OpenAI, Google Gemini, and OpenRouter all issue API keys in a few minutes.
- A short list of pages that are actually current. Not your sitemap — the specific pricing, service, policy, and FAQ pages you would be comfortable having quoted back to a customer verbatim today.
- A named person who answers when the assistant stops. A chatbot with no human behind it is a deflection tool, not support.
If the third item is uncomfortable to write, that is useful information. It usually means the website contradicts itself somewhere, and an assistant reading everything will find the contradiction faster than your visitors do.
Step 1. Choose how the chatbot gets its intelligence
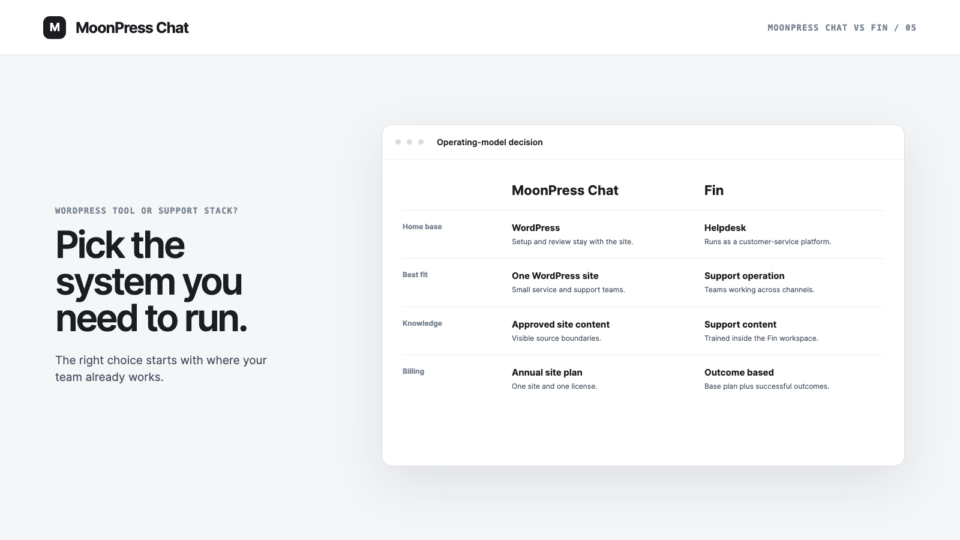
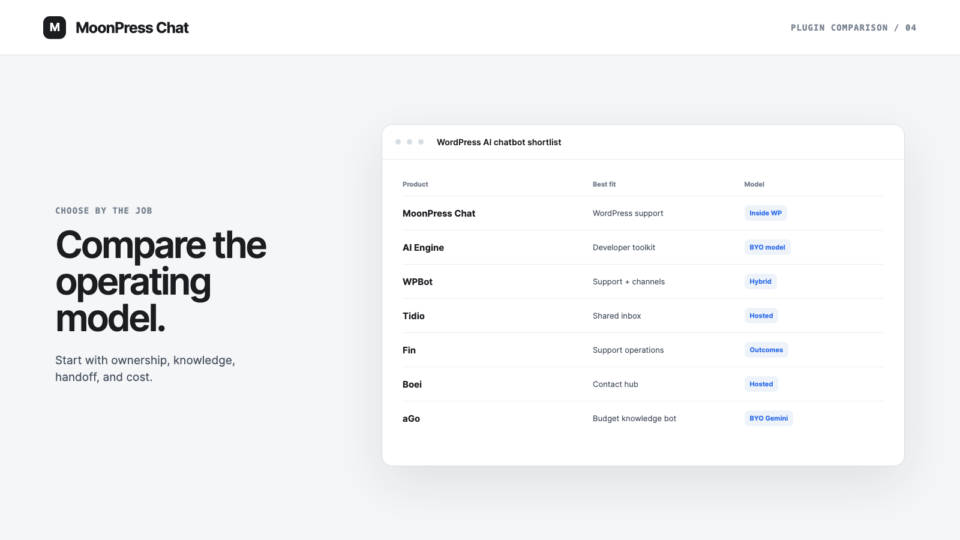
This is the only decision that is expensive to reverse, because it determines where your conversations live and who bills you. There are three common models.
Hosted platform with a WordPress widget. You subscribe monthly, the vendor runs the model and stores the conversations, and the plugin is a thin embed. Setup is the fastest of the three. Your support history and your knowledge base live in their system, and pricing usually scales with conversations or resolutions.
WordPress plugin with your own provider account. The plugin runs inside WordPress, the conversations are stored in your database, and you connect an AI provider account of your own. There is no seat or conversation fee to the plugin vendor; the provider bills its own usage directly. This is the model MoonPress Chat uses, and its useful core is $0 forever with no MoonPress Chat account or license required.
Custom build against a provider API. Maximum control, and you own every piece of the operational work that the other two options hide: knowledge storage, retrieval, consent, retention, logging, and the admin interface your team uses.
Answer three questions and the choice usually makes itself. Do the conversations need to stay on your infrastructure? Do you want one predictable vendor bill or metered provider usage you can cap yourself? And does your team already work inside WordPress, or inside a separate helpdesk?
Step 2. Install the plugin
WordPress chatbot setup starts the same way as any other plugin. For anything on the WordPress plugin directory, this is the standard path: open Plugins → Add New Plugin in your WordPress admin, search for the plugin by name, then choose Install Now and Activate.
For a plugin distributed as a package, download the ZIP first, then use Plugins → Add New Plugin → Upload Plugin, select the file, install, and activate. MoonPress Chat currently installs this way: the official package is downloaded from moonpresschat.com, and its WordPress.org submission is still in manual review at the time of writing. The core stays $0 either way; the directory simply adds a second install and update path once it is approved.
Two things worth doing before you activate anything on a site that matters. Take a backup you have actually restored before, and check whether your host runs a staging copy. A chatbot plugin adds database tables and a front-end widget, and it is much calmer to discover a theme conflict on staging than on your homepage.
Step 3. Connect a provider and choose a model
With a bring-your-own-provider plugin, you generate an API key in the provider console and paste it into the plugin settings. MoonPress Chat supports Anthropic, OpenAI, Google Gemini, and OpenRouter, and adds no markup on that usage — the provider bills you directly, at its own rates, in its own dashboard.
That arrangement has a practical advantage beyond price: the cost controls stay in an account you own. Provider consoles let you set spending limits and see usage per key, which is the fastest way to answer "what is this chatbot costing us" without waiting for a vendor invoice.
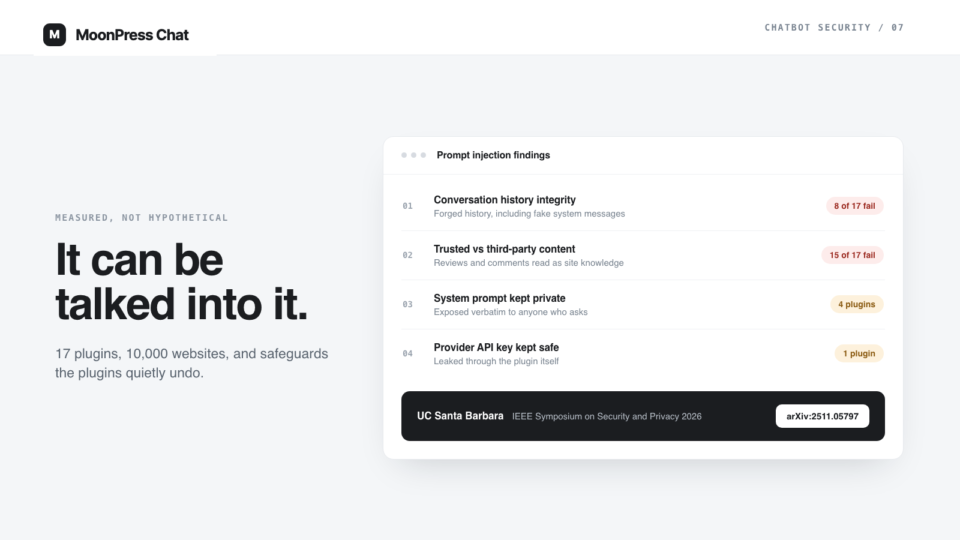
Treat the key as a payment instrument, because it is one. Generate a dedicated key for the site rather than reusing a personal one, keep it out of email and chat threads, and know how to rotate it. If a setup process ever asks you to paste a provider key or a WordPress password into a conversation with an AI agent, stop — that is not a setup step, that is a leak.
Step 4. Decide what the chatbot may read
Most tools offer to crawl your site and make everything they find available to the model. It is the single fastest way to get a confidently wrong assistant.
A live website is not a clean knowledge base. It carries expired campaign pages, duplicate service copy, thin tag archives, an old post describing a discontinued package, and policy wording that only applied in one region. All of it reads as equally true to a crawler.
So separate discovery from approval. Let the tool find pages, then decide which of them the assistant may actually use, and keep that list small enough that a person can review it. MoonPress Chat models this as an explicit approval state: nothing a site analysis finds goes live in an answer until someone approves it. The reasoning behind that design is in our guide on why approved knowledge matters more than a clever prompt.
Step 5. Write the boundaries and the handoff
Now write down what the assistant should refuse. Not as a personality instruction, but as a list of question types where a confident answer would be a problem: quotes and discounts, eligibility promises, medical or legal conclusions, anything about an individual account, anything outside the area you serve.
For each of those, decide the exit. Usually it is a person. That exit is the part teams under-build, because handing over is easy and handing over well is not: the visitor should not have to re-explain what they already typed, and your team should open the conversation with the full context and clear ownership of the reply. We wrote about that in detail in a human handoff should keep the conversation intact.
A useful test for this step: pick the three questions you would least like a stranger to get a wrong answer to, and write the exact response you want instead. If you cannot write it, the boundary is not defined yet.
Step 6. Add consent, and decide retention on purpose
Visitors should know they are talking to an AI assistant before they type anything personal, and that disclosure should be readable in the language they are using. It is both a fairness point and a practical one: people phrase questions differently when they know a machine is answering.
Retention needs an actual decision rather than a default. Conversations become support evidence and product research, and they also become personal data the moment someone types a phone number into one. Decide how long you keep them, who on your team can read them, and what your privacy policy now needs to say — including the fact that your chosen model provider processes the message content.
Step 7. Test privately, then launch
Before the widget is public, run the assistant against real traffic patterns rather than the demo questions it will obviously pass. Ask your top five support questions the way customers actually phrase them, typos included. Ask something the site genuinely does not answer, and confirm the assistant stops instead of improvising. Ask in a second language if you have second-language visitors. Then run one complete handoff and check what your team receives.
Also decide the rollback before you need it: how the widget gets switched off, who has access to switch it off, and what the site looks like without it. Our launch checklist for a WordPress AI chatbot plugin covers the full gate, including privacy and multilingual checks.
What "live" should mean a week later
A chatbot is not a launch, it is an operating loop. The most valuable thing it produces in week one is not answers — it is a list of questions your website does not answer. That list is a content plan, a pricing-page fix, and usually a couple of surprises about what visitors actually want to know.
Set a review date in the calendar for seven days after launch. Read the unanswered questions, the handoffs, and any answer tied to a page you have since changed. Fix the knowledge rather than the prompt wording, and the assistant improves in a way you can explain to someone else.
FAQ
Do I need to know how to code to add an AI chatbot to WordPress?
No. Installing a chatbot plugin uses the same Plugins screen as any other WordPress plugin, and configuration happens in an admin interface. Coding only becomes necessary if you build a custom integration against a provider API instead of using a plugin.
Do I have to pay a subscription for a WordPress AI chatbot?
Not necessarily. Hosted platforms usually charge a monthly fee, while bring-your-own-provider plugins can be free and let the AI provider bill you for usage directly. MoonPress Chat’s core is $0 forever with no MoonPress Chat account or license; you pay your chosen provider for the model usage. MoonPress Chat Pro is priced at $200 a year and is still in development.
How long does it actually take to set up?
Installing the plugin and connecting a provider takes roughly ten to fifteen minutes. Deciding which pages the assistant may use, writing its boundaries, defining the human handoff, and testing privately typically takes a few focused hours, and that is the work that determines whether the chatbot is useful.
Can an AI chatbot answer using my own site content?
Yes, and this is where the important distinction sits. Most tools can read your pages; fewer let you approve which pages the assistant may treat as authoritative before it answers a visitor. Approval matters because live websites contain outdated and internal material that reads as equally true to a crawler.
Start with a plugin you can inspect
If you want to run through these seven steps on a real site, MoonPress Chat is a free WordPress AI chatbot plugin built around exactly this sequence: site analysis with an approval step, editable instructions and boundaries, a handoff that keeps the conversation intact, consent, and reporting on the questions nobody answered. Its core is $0 forever, and you connect your own provider account.
The setup page walks through the install, and there is an optional public setup skill for local AI agents that prepares the configuration without ever asking for your passwords or provider keys in a chat window.